How to Pair Fluted Panels With Minimalist Furniture

How to Pair Fluted Panels With Minimalist Furniture

Minimalist interiors are loved for their calm, uncluttered look. Clean lines, simple forms and neutral palettes help create spaces that feel organised and relaxing. Yet many minimalist rooms can sometimes feel a little flat or lacking in personality. That is where fluted panels come in.

Fluted panels introduce texture and rhythm to a space without disrupting the simplicity that defines minimalist design. When paired thoughtfully with minimalist furniture, they create interiors that feel warm, refined and visually balanced.

Understanding how to combine these two elements allows you to add depth to a room while keeping the overall aesthetic clean and modern.

Why Fluted Panels Work So Well With Minimalism

Minimalism focuses on removing visual noise. Furniture tends to have simple shapes, smooth surfaces and neutral colours. While this keeps the room calm, it can sometimes leave walls looking plain.

Fluted panels solve this problem by introducing subtle texture. Their vertical grooves add visual interest without overwhelming the space. Instead of relying on bold colours or decorative patterns, the design relies on light and shadow created by the grooves.

This approach aligns perfectly with minimalist principles. Rather than adding more objects, you enhance the space through thoughtful materials and surfaces.

A fluted wall panel is especially effective because it provides dimension while still maintaining a streamlined appearance. The vertical lines naturally draw the eye upward, which can also make ceilings appear taller.

Start With a Neutral Colour Palette

Colour is one of the most important elements when pairing fluted panels with minimalist furniture.

Minimalist interiors typically rely on neutral tones such as:

  • Soft white
  • Warm beige
  • Light oak
  • Sand or taupe
  • Charcoal grey

Choosing fluted panels in similar shades helps maintain harmony throughout the room.

For example, light oak panels paired with cream furniture can create a soft Scandinavian-inspired environment. Meanwhile, darker walnut panels combined with grey sofas can produce a more modern and sophisticated look.

The goal is to keep colours calm and cohesive. When the palette stays simple, the texture of the panels becomes the star of the room.

Use Fluted Panels as a Feature Wall
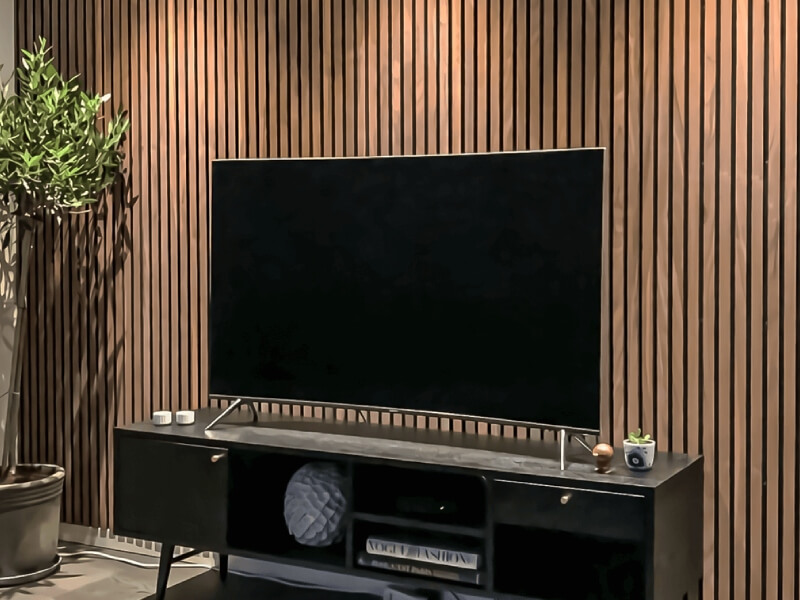
Use Fluted Panels As A Feature Wall

Minimalist spaces benefit from clear focal points. Instead of decorating every wall, choose one area to highlight.

A fluted panel feature wall works beautifully in spaces such as:

  • Behind the living room sofa
  • Behind a television console
  • At the headboard wall in a bedroom
  • Along an entryway corridor

This approach keeps the room balanced. The panels become a visual anchor while the rest of the room remains simple and uncluttered.

When done well, the space feels intentional rather than overly decorated.

Choose Furniture With Clean, Simple Lines

Minimalist furniture is defined by its clarity of form. When pairing it with fluted panels, simplicity is key.

Look for furniture that has:

  • Straight or gently curved lines
  • Slim profiles
  • Low visual weight
  • Minimal ornamentation

Pieces such as platform beds, streamlined sofas, floating consoles and simple coffee tables work especially well.

Avoid furniture that is heavily carved, bulky or overly decorative. Too many intricate details can clash with the clean vertical rhythm of the panels.

Instead, allow the panels to provide texture while the furniture provides structure.

Balance Texture With Smooth Surfaces

A room that is entirely textured can feel overwhelming. Since fluted panels already introduce depth, it helps to balance them with smoother surfaces.

Consider pairing them with materials such as:

  • Smooth marble tabletops
  • Matte cabinetry
  • Glass lighting fixtures
  • Upholstered fabric seating

This contrast creates visual balance. The grooves of the panels stand out more clearly when placed next to simple surfaces.

Minimalist design often relies on this subtle interplay between textures rather than dramatic decoration.

Keep Furniture Layouts Open and Spacious
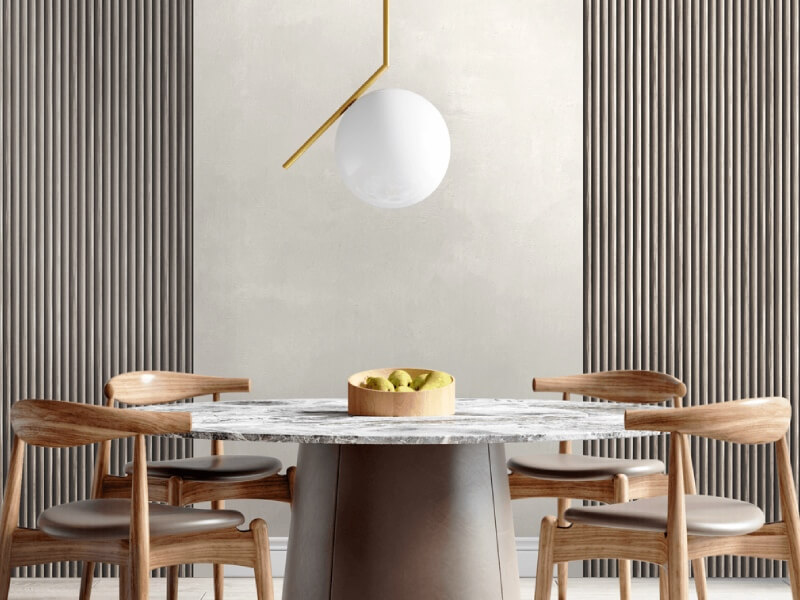
Keep Furniture Layouts Open And Spacious

Minimalist spaces thrive on openness. Even the most beautiful feature wall can feel crowded if too much furniture fills the room.

Try to keep layouts simple and intentional. A few well-chosen pieces often work better than many smaller items.

For example, a living room might include:

  • A three-seat sofa
  • One accent chair
  • A simple coffee table
  • A slim console

With this arrangement, the fluted panel wall remains visible and becomes part of the room’s visual flow.

Allowing negative space around furniture also helps highlight architectural features like panelled walls.

Use Lighting to Highlight the Panels

Lighting plays a powerful role in how fluted panels appear.

Because the surface contains grooves, light naturally creates shadows that emphasise the texture. Proper lighting can make the panels look even more striking.

Some effective lighting ideas include:

Wall washers or LED strips
Placed above or below the panels, they create gentle shadows that highlight the grooves.

Pendant lighting
Hanging lights positioned near the panel wall can cast interesting light patterns.

Warm ambient lighting
Warm tones enhance wood panels and create a cosy atmosphere.

When lighting is used thoughtfully, the vertical lines become a subtle design feature that changes throughout the day.

Mix Natural Materials for a Warm Minimalist Look

Minimalist design does not have to feel cold. Combining fluted panels with natural materials helps create warmth and comfort.

Popular pairings include:

  • Wood panels with linen sofas
  • Oak panels with stone coffee tables
  • Walnut panels with leather chairs
  • Light timber panels with woven rugs

These combinations introduce softness while maintaining the simplicity that defines minimalist spaces.

Natural materials also age beautifully, which is why many designers say good materials never go out of style.

Avoid Overdecorating the Panel Wall

Once you install fluted panels, resist the temptation to cover them with too many decorative items.

Large artwork, shelves or cluttered decorations can interrupt the clean vertical pattern.

Instead, consider minimal accents such as:

  • A single framed artwork
  • A slim floating shelf
  • A tall indoor plant
  • A simple wall sconce

These additions maintain visual interest while allowing the texture of the panels to remain visible.

Minimalism is about restraint, and this principle applies strongly when designing around feature walls.

Apply the Look Across Different Rooms
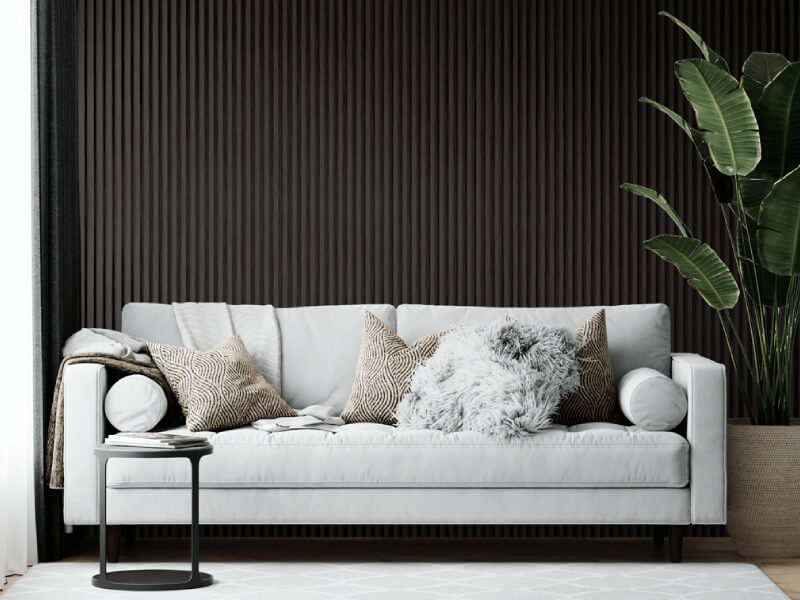
Apply The Look Across Different Rooms

Fluted panels and minimalist furniture can work beautifully across many parts of the home.

Living Rooms
Panels behind the television or sofa create a modern focal point.

Bedrooms
Vertical panels behind the bed provide texture while keeping the space calm.

Dining Areas
Panels along a dining wall can elevate the atmosphere without overwhelming the room.

Entryways
A fluted panel wall paired with a slim console table makes a stylish first impression.

Because the design is subtle, it adapts easily to both small apartments and larger homes.

Creating a Balanced, Timeless Interior

Pairing fluted panels with minimalist furniture is about balance. The panels provide texture and architectural interest, while the furniture keeps the room functional and uncluttered.

When colours remain neutral, layouts stay open and materials are chosen thoughtfully, the result is an interior that feels calm yet visually engaging.

Rather than relying on trends or heavy decoration, the design works through proportion, texture and light. This is what makes minimalist interiors feel both modern and timeless.

If you are considering adding fluted panels to your space, choosing high-quality materials and professional guidance can make a significant difference in the final result.

Explore the range of design options available at Wallhub to find fluted panel solutions that can help you create a refined minimalist interior that feels stylish, balanced and built to last.

Waterproofing Limewash in Humid Areas Without Losing Texture

Waterproofing Limewash in Humid Areas Without Losing Texture

Soft movement across a wall. Gentle tonal shifts that change with the light. Limewash has a quiet charm that many modern homeowners love, especially in warm, humid climates where heavy finishes can feel suffocating. Yet one concern often comes up: how do you protect limewash in moisture-prone areas without ruining its beautiful, powdery texture?

Humidity is part of everyday life in places like Singapore. Bathrooms, kitchens, balconies and even air-conditioned bedrooms can experience condensation. If you are considering limewash paint in Singapore, understanding how to waterproof it properly will help you enjoy its natural look for years without compromising its character.

Let’s walk through it in a practical, realistic way.

Why Limewash and Humidity Can Clash

Why Limewash and Humidity Can Clash

Limewash is a mineral-based coating made primarily from slaked lime and water. Unlike acrylic paints, it soaks into porous surfaces and forms a breathable, matte finish. That breathability is one of its strengths. It allows walls to release moisture rather than trap it.

However, constant exposure to water splashes, steam or heavy condensation can weaken the surface over time. You might notice:

  • Fading or patchiness
  • Powdery residue rubbing off
  • Slight staining in high-contact areas

This does not mean limewash is unsuitable for humid homes. It simply means it needs thoughtful placement and the right protective system.

Where Limewash Works Best in Humid Homes

Limewash performs beautifully in:

  • Living rooms
  • Bedrooms
  • Dining areas
  • Dry corridors

It is also increasingly popular in minimalist homes for its soft depth and subtle texture. That cloudy, layered look adds warmth without visual clutter.

For bathrooms and kitchens, the approach needs to be more strategic. Feature walls away from direct water contact are generally fine. Shower enclosures and backsplash zones, however, require additional protection.

The Key: Protect Without Sealing It Completely

The Key: Protect Without Sealing It Completely

The biggest mistake people make is applying a thick, glossy waterproof coating over limewash. This flattens the finish and removes the delicate movement that makes limewash special.

Instead, the goal is to:

  • Repel surface moisture
  • Maintain breathability
  • Preserve the matte, textured appearance

Achieving this balance requires the right type of sealer.

Step 1: Ensure Proper Surface Preparation

Before even thinking about waterproofing, make sure the base is correct.

Limewash needs a porous surface to bond well. Suitable substrates include:

  • Cement render
  • Plaster
  • Mineral-based skim coats

Avoid applying limewash directly onto glossy paint or sealed surfaces without proper priming. In humid conditions, poor adhesion becomes more obvious over time.

If you are working with a professional supplier of limewash paint in Singapore, they should advise on compatible primers designed specifically for mineral coatings.

Step 2: Allow Full Curing Before Sealing

Patience matters.

Fresh limewash continues to carbonate and cure for several days. Applying a sealer too early can interfere with this natural process and affect both durability and texture.

Typically:

  • Wait at least 5–7 days before applying any protective topcoat.
  • Ensure the wall is fully dry.

Humidity can slow curing slightly, so good ventilation helps.

Step 3: Choose a Breathable, Matte Sealer

This is where the real difference lies.

Look for sealers that are:

  • Vapour permeable
  • Designed for mineral paints
  • Low-sheen or completely matte

Siloxane-based or specialised mineral sealers are often recommended because they repel liquid water while allowing vapour to escape.

When applied correctly, these sealers:

  • Reduce staining
  • Increase surface durability
  • Maintain the soft tonal variation

They should not create a plastic-like film on top of the wall.

Always test on a small patch first. Even matte sealers can slightly deepen the colour, so previewing the result avoids surprises.

Step 4: Apply Light, Even Coats

More is not better.

A thick application can:

  • Darken the finish unevenly
  • Reduce texture visibility
  • Create mild sheen

Instead:

  • Use a roller with minimal pressure
  • Apply thin, even coats
  • Avoid overworking the surface

Two light coats are generally safer than one heavy coat.

If sprayed, ensure controlled misting rather than saturation.

Step 5: Be Realistic About High-Water Zones

Let’s be honest. Limewash is not tile. It is not epoxy. It is not meant to sit behind constant water spray.

For shower interiors or heavy-duty splash zones, consider:

  • Using limewash only on upper sections of the wall
  • Pairing it with tiles or stone in wet areas
  • Installing proper ventilation systems

In kitchens, limewash can work behind open shelving or dining areas, but directly behind a hob or sink may require extra caution or alternative finishes.

Design does not have to be all or nothing. Blending materials often creates a more thoughtful, layered space anyway.

Ventilation Is Just as Important as Waterproofing

Ventilation Is Just as Important as Waterproofing

Humidity management goes beyond surface treatment.

Even the best breathable sealer cannot compensate for poor airflow. To protect limewash in humid homes:

  • Use exhaust fans in bathrooms
  • Open windows regularly where possible
  • Avoid drying wet towels against limewashed walls
  • Fix leaks promptly

Condensation control reduces long-term stress on any paint system, not just limewash.

Cleaning Limewashed Walls in Humid Areas

Maintenance should be gentle.

Avoid:

  • Harsh chemical cleaners
  • Abrasive scrubbing pads
  • High-pressure water

Instead:

  • Use a soft, slightly damp cloth
  • Blot rather than rub
  • Address stains early

If sealed properly, light splashes can be wiped away without damaging the finish.

Does Waterproofing Change the Look?

Does Waterproofing Change the Look?

A common worry is that sealing will remove the charm of limewash.

When done correctly, changes should be subtle:

  • Slight deepening of tone
  • Minimal sheen (if using a proper matte product)
  • Texture remains visible

What you should not see is:

  • Glossy reflection
  • Plastic-like coating
  • Flattened tonal variation

Testing is your best friend here.

Is Limewash Still Worth It in Humid Climates?

Is Limewash Still Worth It in Humid Climates?

Absolutely, with smart planning.

Humidity does not automatically disqualify limewash. In fact, its breathable nature makes it more forgiving than some conventional paints that trap moisture behind a film.

The key principles are simple:

  • Use it in appropriate areas
  • Allow proper curing
  • Apply breathable protection
  • Maintain good ventilation

When approached thoughtfully, limewash can thrive even in tropical homes.

The Texture Is the Star

Limewash stands out because it feels alive. The layered brush marks, cloudy movement and chalky softness cannot be replicated by standard paints.

Waterproofing should support that beauty, not erase it.

If you are planning to incorporate limewash into your home and want guidance on suitable sealers, application methods or humidity-friendly solutions, speak to specialists who understand both the material and the local climate.

Wall finishes are long-term decisions. Choosing the right system from the start saves time, cost and frustration later.

Ready to explore limewash options tailored for humid homes? Speak to the team at Wallhub and find the right balance between protection and texture for your space.